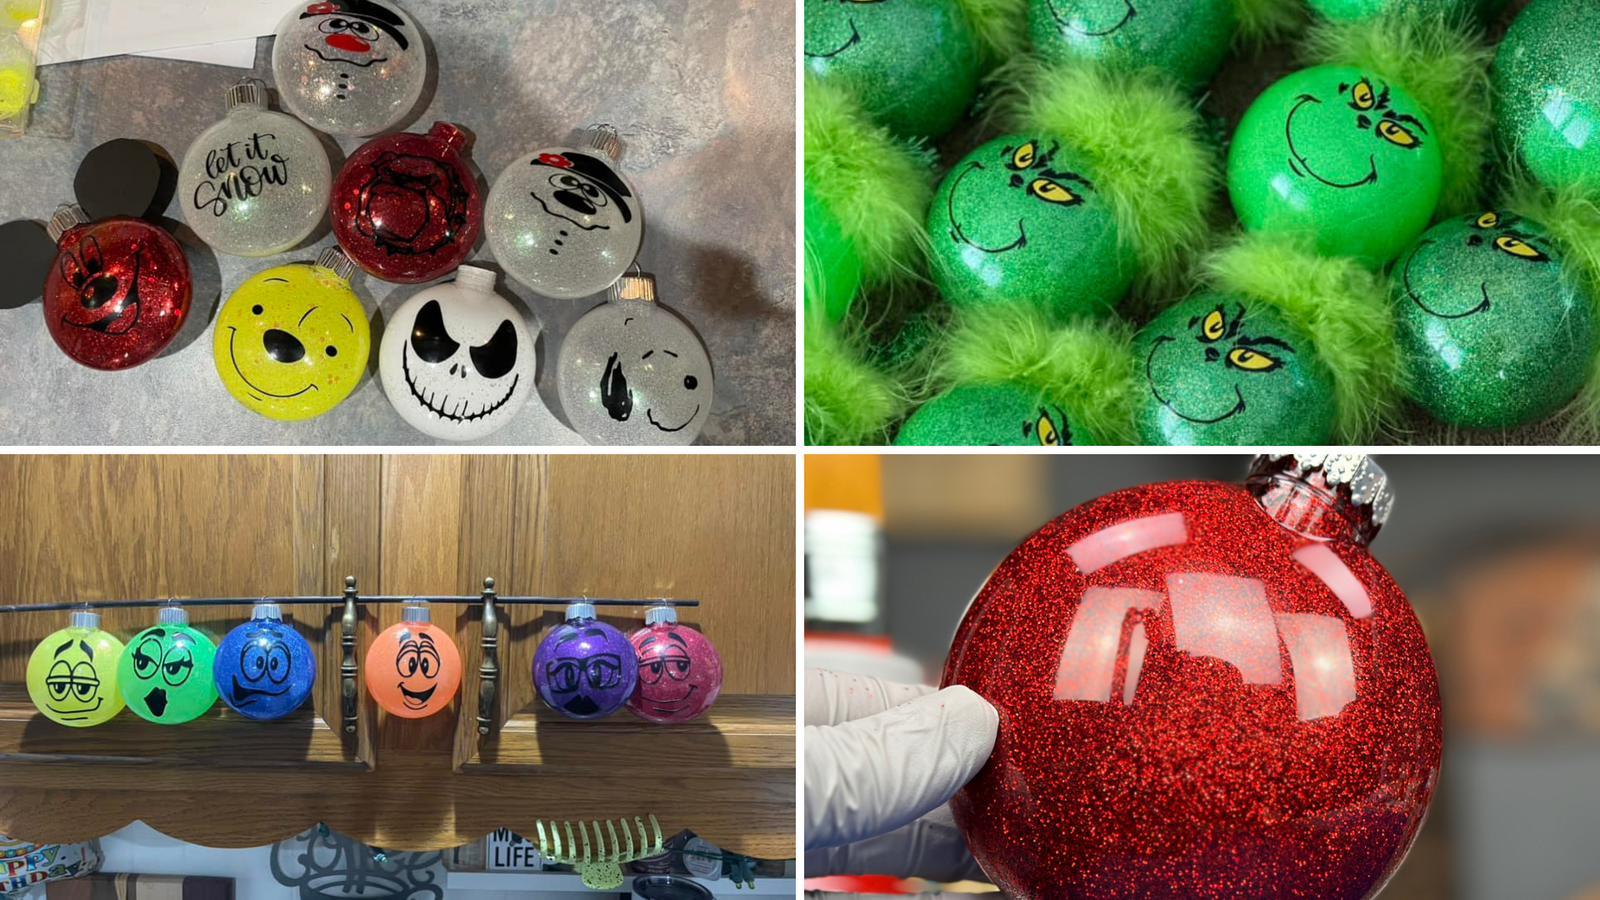
@corinneblackstone0 The new makers magic from @Scorch Marker is perfect for making those glitter ornaments! Have you made these before? I’ve tested tons of adhesives and hacks for these and you can see that on my YouTube channel but this makers magic is new and is great!
What Materials Do I Need to Make Glitter Ornaments?
- Maker's Magic
- Glitter (fine glitter works easier)
- Clear Plastic Ornaments
- Vinyl Design (optional)
- Funnel (optional for the glitter)
How long does the Maker's Magic need to dry before adding glitter?
You only need to let Maker's Magic dry for 1-3 minutes before adding your glitter!
Why should I use Maker's Magic to create glitter ornaments?
Previously the options of what actually worked quickly with making ornaments was limited. There were problems like cloudy coats, glitter clumping, the liquid inside the ornament not being dry or tacky enough to hold the glitter.
Maker's Magic eliminates all that! You don't use nearly as much product and it dries faster!
Check out these Grinch Ornaments our very own Angila made with Maker's Magic!

How to Make Glitter Ornaments
Gather your supplies and get a clean craft space to create it. We do recommend laying down either a placemat or wax paper to prevent any additional mess and it makes for an easier clean up from the glitter!
Step 1: Apply Maker's Magic
Put Maker's Magic inside your plastic ornament. Depending on the size of the opening you may need to use a small funnel. You won't need a lot to coat the inside of the ornament.
Step 2: Swirl Maker's Magic
Once you have your Maker's Magic inside your plastic ornament, you'll want to swirl it all around the inside to make for a good coat on the inside. Getting towards the top of your ornament can be a bit tricky so take your time.
Step 3: Pour Excess Back
The amazing thing about this is you can pour back any excess Maker's Magic that the ornament doesn't absorb. Less waste and saves more money!

Step 4: Add Glitter
Now to the super fun part, GLITTER! If you're ornament top is large enough you can directly pour your choice of glitter into the ornament. If you have a smaller top then you may need a small funnel to make it easier. If your glitter container has a cool pour spout, even better!

Step 5: Swirl Your Glitter
Just like with the swirling of the Maker's Magic, you're going to swirl around your glitter. You can always add more if you think the ornament needs it.
You can also put your hand over the top of the ornament and then shake to scatter the glitter more. (Sometimes this is faster if you added a lot of glitter)

Step 6: Empty Out Excess Glitter
Another bonus with using Maker's Magic, you can empty out any extra glitter right back into the container. There's no residue in the extra glitter that will effect leftover glitter or make the glitter container clumpy.

Step 7: Add Your Toppers
Let your plastic ornaments dry for about 5 minutes (or less) and then you can add your ornament tops back on and they're FINISHED!
Yes, it's that easy!
If you have issues with the pins on the toppers being bent, you can easily use a sharp point to get them from flat to back where they need to be in no time!

How to Take Your Glitter Ornaments to the Next Level
We said the possibilities were endless with these glitter ornaments and we meant it! Here are some ways you can make these even better:
- Add vinyl in your design of choice (flatter ornaments are better for this but it can be done on the entirely round ornaments)
- Paint on them (acrylic works well and you can use Maker's Magic over it to seal it on the ornament)
- Use Sharpie Markers (these may take a few layers to add a deep color on the ornament)


Leave a comment (all fields required)