

Wall art can get costly.
And, with rustic, wood-burned looks taking over the trends these days, some pieces can be quite overpriced.
That’s why many people are choosing to take the DIY route to make their own personalized signs.
These creations are not only fun to make, they are also perfect for home decor and gift-giving.
Wood Burned Garage Signs are the Perfect Gift for Any Man in Your Life
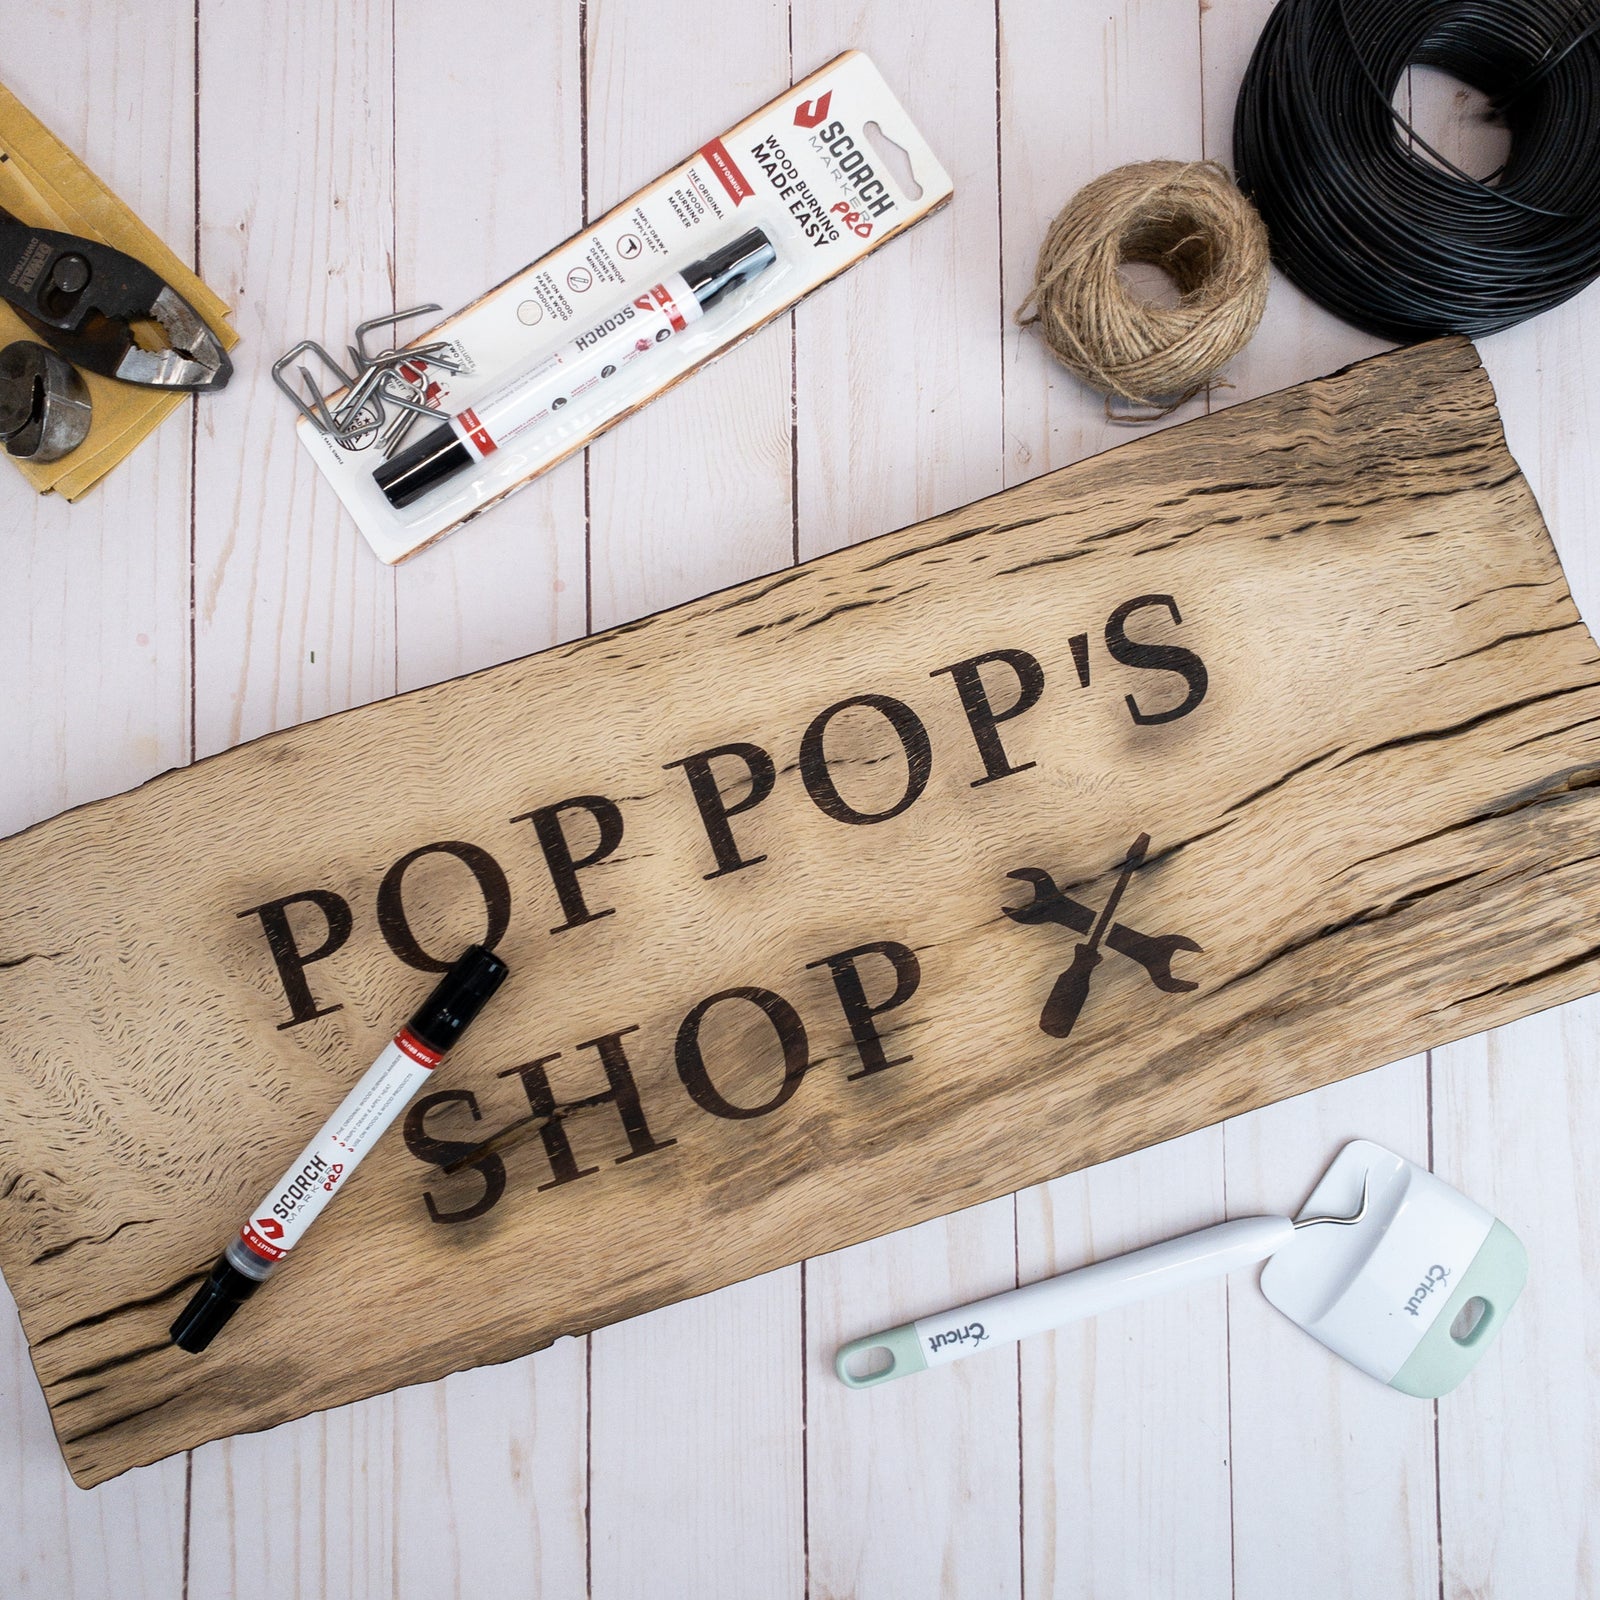
The Scorch Marker is a great tool to keep on hand for crafting any personalized wood-burned project.
It’s easy to use, but most importantly fun!
In this article, we’re showing you how to make a simple, rustic personalized garage sign for anyone in your life.

8 Steps for the Perfectly Personalized Wooden Garage Sign
For our garage sign, we decided to go with a beautiful piece of rustic oak wood.
Oak is a wonderfully strong wood that requires a little bit of patience but produces beautiful results.
You can choose any cut of wood you’d like. The steps will be the same either way.
1. Sand Your Wood Surface to 220-grit
It is so important to prep your wood before working with it.
This will help your stencil stick to the surface while also preventing the liquid from running.
A properly sanded surface will result in a garage sign with clean, crisp lines.
We sanded our surface to 220-grit, which is extremely fine.
This gave us a finish that was very smooth and easy to write on.
2. Apply Your Stencil Firmly
With the surface sanded, it’s time to apply your stencil.
Scorch Marker can be combined with any stencil of your choice.
We’ve successfully used stencils made from silkscreen, vinyl, paper, plastic, and metal with the Scorch Marker.
For this project, we decided to go with a vinyl stencil cut with our Cricut.
The vinyl sticks to the wood surface, but is removed easily after drawing, which works really well for us!
If using vinyl stencils, make sure to use a card scraper to apply the material to your wood surface firmly to prevent the marker from bleeding underneath it.
3. Apply a Small Amount of Liquid to Your Wood
Now it’s time to draw!
With your Scorch Marker, fill in the spaces of the stencils.
Remember, a little goes a long way.
Using too much liquid will result in a messy project with bleeding edges.
When using a vinyl stencil, you also want to give your project a few minutes to set before removing it.
This will allow the liquid of the Scorch Marker to soak into the fibers of the wood.
4. Preheat Your Heat Gun on High
While you wait, set your heat gun to begin preheating.
A preheated heat gun requires less time in your hand and effort on your part.
It also minimizes the risk of burn spots on other areas of the wood.
We recommend a heat gun that is at least 1500-watts to ensure your design comes up to temperature.
This one on Amazon is the one we use in all our TikTok videos.
5. Watch the Magic Happen
It’s time for the fun!
In a sweeping motion, use your heat gun, torch, or other heat source to apply heat to your design.
Within a few seconds, you will begin to see the color change take place.
While this looks like magic, it’s really a chemical reaction happening inside the fibers causing the first few layers of your wood to burn.
For a more rustic look, we also used our heat gun on the wood grain to help it “pop” and add more depth to the garage sign.
6. Add Staples to Your Wood Plank
With the wooden plank decorated, it’s now time to turn it into a sign.
Use a hammer to add two staples to each end of your sign.
Make sure to leave about ½” of the staple still sticking out of the wood.
This will be used for hanging your sign.
A rubber mallet may be required for straightening out your staples.
7. Use Wrapped Wire to Hang Your Sign
Now, use hanging wire to finish off your garage sign.
Insert approximately 6-7 inches of hanging wire through the first staple, but don’t fully tighten it yet.
Find the middle of your sign and pull the wire up about 10 inches from the top.
This is the area where your sign will hang.
Then, insert the other end of your hanging wire through the other staple.
Use a pair of pliers to tighten the knots and wrap the excess wire around itself.
8. Hang Your Sign
And you did it!
Hang your sign, wrap it for a gift, or admire it in some other way, but you are done.
You just completed a beautiful, rustic, personalized garage sign for much less than you could get one in the store.
Give yourself a pat on the back.
You deserve it!
Scorch Marker is a Wonderful Tool for Every Crafting Garage
The Scorch Marker really is a wonderful tool for every crafter.
It provides a look that can’t be achieved by much else but is also simple and easy to use.
It’s the perfect addition to every crafting garage!
Get yours today - and with 20% off - by using the code ‘itslikemagic’ and let us know what you think on Instagram!


Robert flaro
February 22, 2024
What is the cost. Is it a kit gun markers and stencils