

Welcome, craft enthusiasts and St. Patrick's Day lovers! As we gear up to celebrate the luckiest day of the year, why not add a touch of DIY charm to your décor?
In this tutorial, we'll walk you through creating a stunning St. Patrick's Day wreath using wood-burning techniques. Get ready to channel your inner leprechaun and let's get crafting!
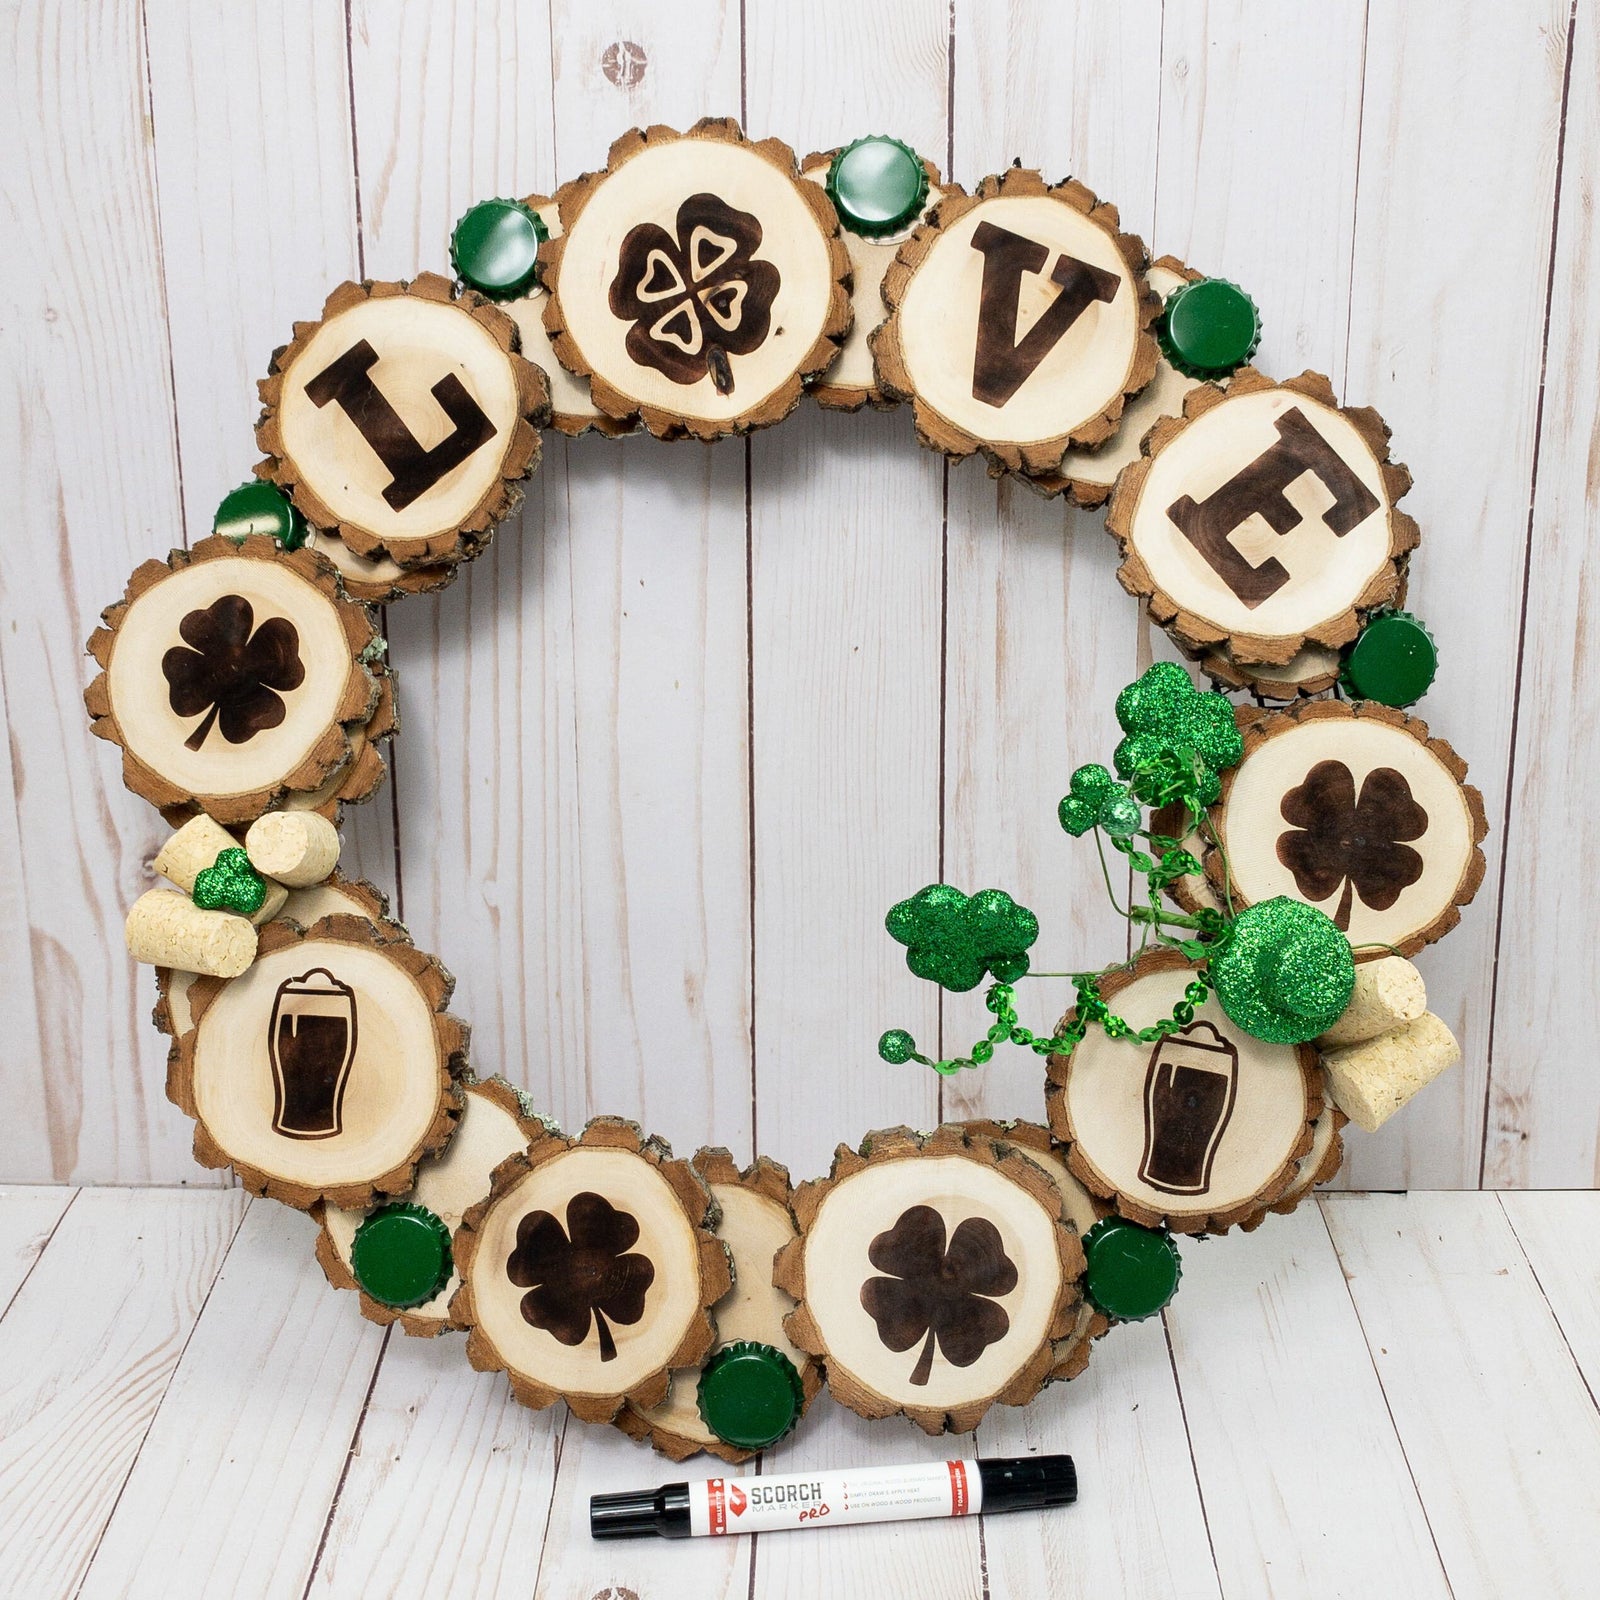
Scorch Marker wreaths are so much fun to make, and can be adjusted to fit the time of year.
Celebrate All Your Holidays with Scorch Marker
With the Scorch Marker, we’ve built our own Valentine’s wreath, and shown you the best steps for personalizing a Christmas cutting board.
This crafting tool is one of the best for keeping handy around the holidays. It can even be used to design gifts!

Materials You Will Need:
- About 21 wood rounds
- Hot glue gun & hot glue
- Sandpaper
- Heat Gun
- Scorch Marker Pro
- Wire wreath Frame
- St. Patrick’s Day Stencils [use the code ‘ilovestencils’ to get them free!]
- Corks, Bottle Caps, and other St. Patty’s decor

Step 1: Sand 10 Wood Rounds on One Side
Because we’re double-stacking our wood rounds, only 10 need to be sanded down.
For some types of wood, 220-grit sandpaper is enough to prevent bleeding underneath the stencil. Others may require you to finish it at 500-grit.
Either way, sanding is absolutely necessary for preventing the grain from picking up your liquid.
Step 2: Double Stack Wood Rounds
To give your wreath a nice, three-dimensional shape and appearance, you’re going to stack your wood rounds. Make sure to keep the sanded ones to the side so those don’t accidentally end up on the bottom.
For me, I did 12 on the bottom with all the rounds touching each other. Then, I glued the 10 wood rounds on top, with each one positioned between two on the bottom.
@scorchmarker My 1st ever St. Patty’s wreath 🍀 #scorchmarker #crafty #craftymom #craftingtutorials #craftymama #craftingeek #cricut ♬ Fire for You - Cannons
Step 3: Apply Your Stencils As Desired
Once the glue has dried, you can begin applying stencils to the wood rounds.
Make sure to use the code ‘ilovestencils’ to get them for free!
Protip: Use a card scraper to get all the air bubbles out of your vinyl stencil.
This will help prevent bleeding.
Step 4: Fill Stencils Lightly with the Scorch Marker
It doesn’t take much of the Scorch Marker liquid to get the job done!
With the marker nib or foam brush, apply a light layer of it to each stencil.
Step 5: Dry and Peel
As you work your way around the wreath, allow the stencils you’ve already filled in to dry for at least 2-3 minutes before removing them.
Once the liquid has set, begin peeling all of your vinyl from the wood. As you do this, start preheating your heat gun on high.
Step 6: Heat Your Wreath
Your heat gun should be nice and hot by now.
This is going to reduce the time it takes for the chemical reaction to take place.
Carefully, and in a sweeping motion, begin applying heat to your stenciled designs.
You should begin to see the magic happen before your eyes!
Step 7: Add a Little Spice
Now add some personality!
We used corks, green bottle caps, and St. Patrick’s Day themed tinsel garland to bring some color and life into our wreath.
But you can do whatever you’d like! Ribbons, clover, and flowers are all great ideas for personalizing your wreath.
If you decide to make one too, tag us in your video. We’d love to see it.


Leave a comment (all fields required)