

There is nothing quite as unique, or special, as designing and creating your own home decor.
It’s so much more personal than buying it from a store, and the Scorch Marker makes it possible to create permanent, lasting designs.
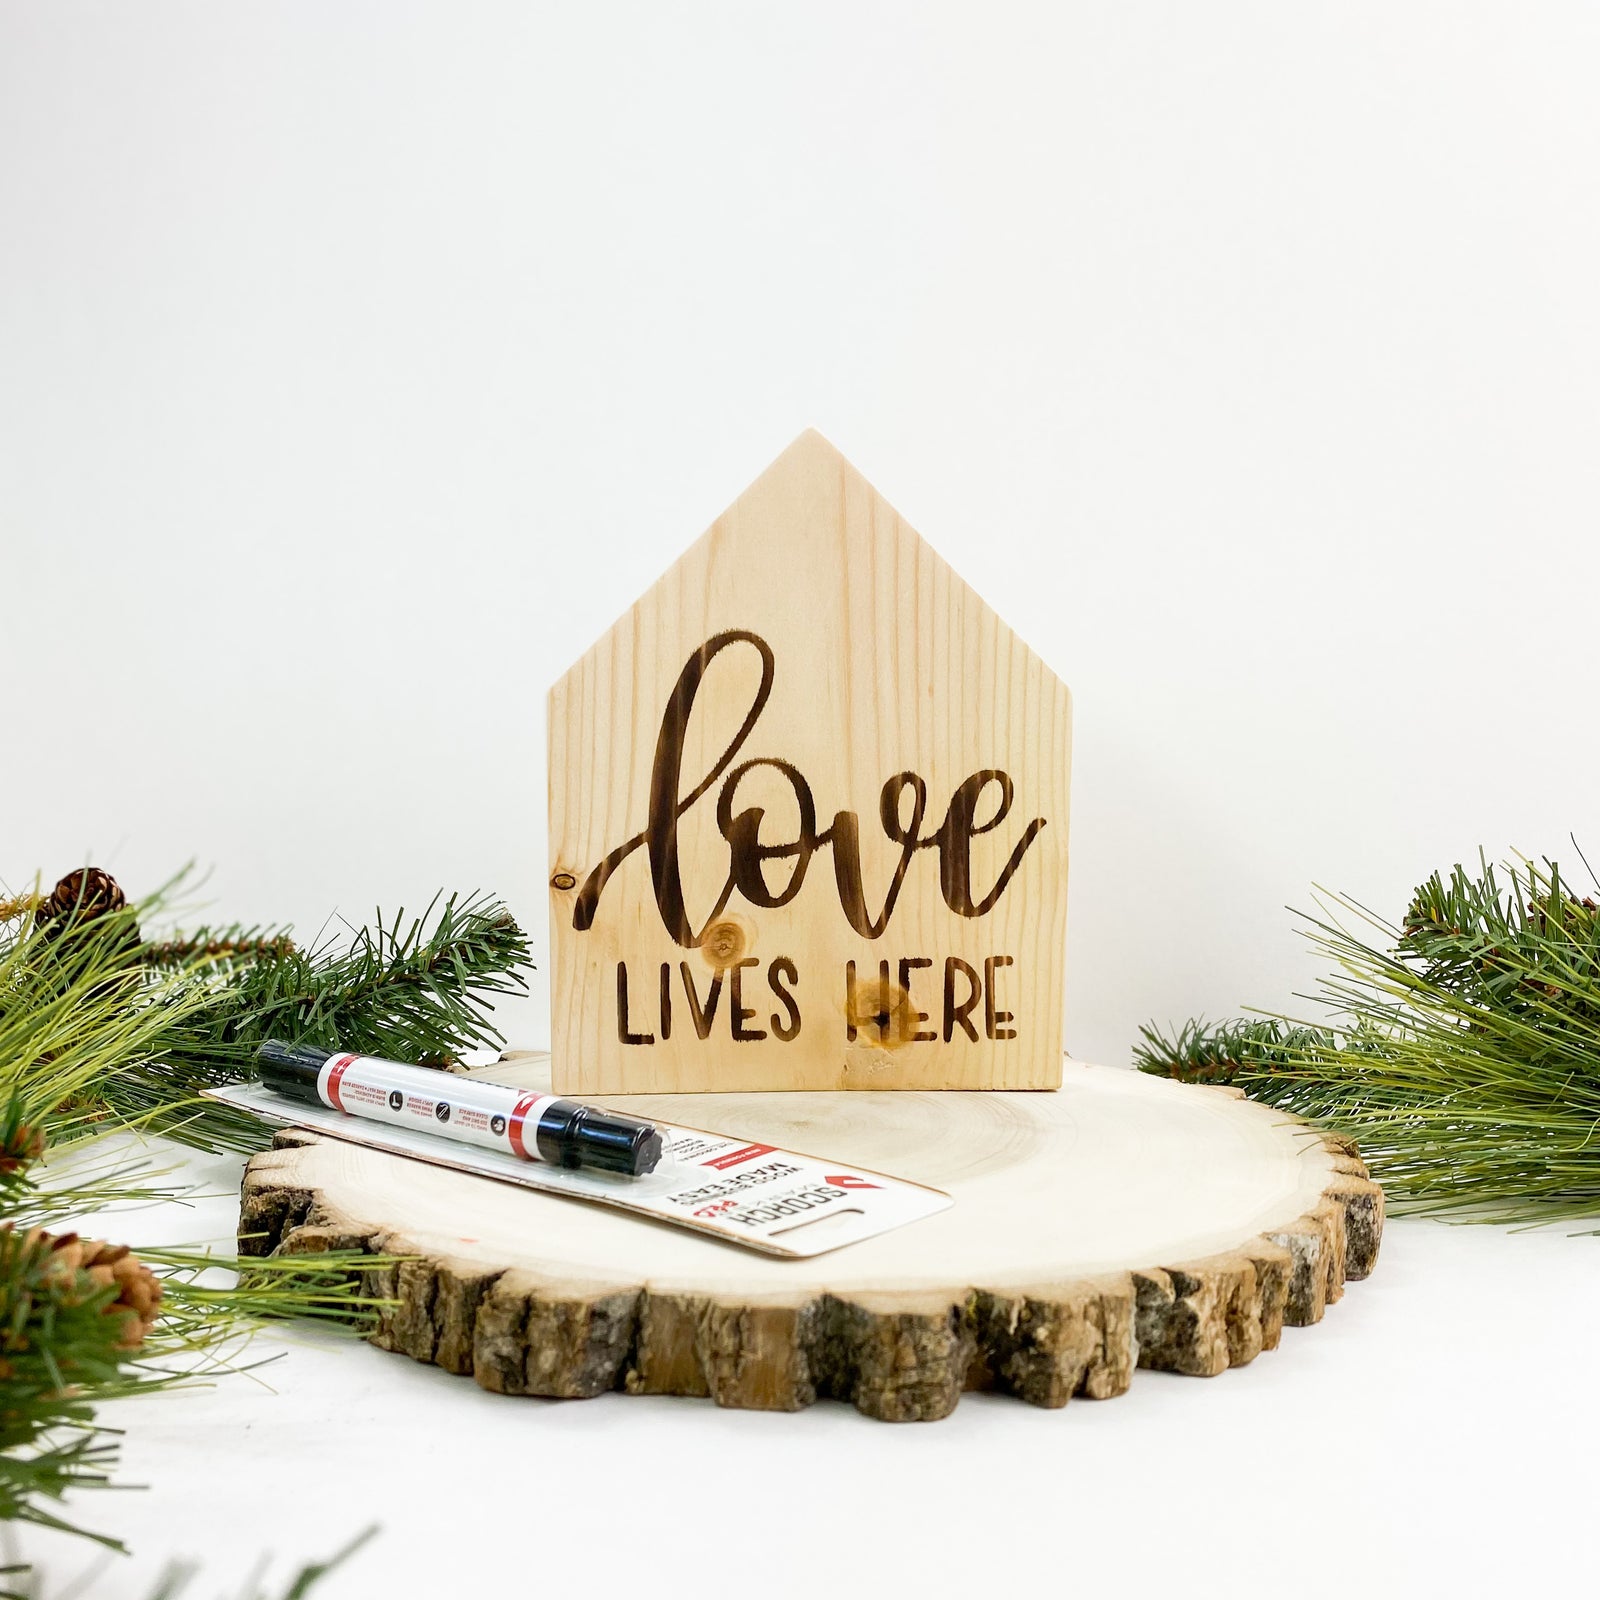
Today, we’re teaching you how to wood burn your own “Love Lives Here” house-shaped wall hanger.
Wood Burning Custom Decor has Never Been Easier
With the Scorch Marker, you can burn creative decor made from wood, canvas, paper mâché, and even denim.
This custom wood-burning pen truly opens up the world of pyrography and makes it even better.
Create Scorch Marker Home Decor in 5 Simple Steps
But, how do you use the Scorch Marker?
It’s simple!
As the name implies, the Scorch Marker can be used just like a typical marker.
All you really need to do is draw or color in the area you want to burn, heat it up, and watch your design come to life.
To see us create this craft on video, check us out on TikTok.

1. Sand Your Surface Evenly
To get started with this craft, you’re going to need a house-shaped piece of wood.
We found our blanks on Etsy, but if you’re especially crafty you can even try cutting your own.
Regardless of the surface you choose, it is vital that your sand your surface thoroughly.
We recommend sanding progressively to 500-grit in order to achieve a smooth surface and crisp crafting edges.

2. Apply Your Stencil and Fill it In
With your surface sanded and wiped clean, it’s time to apply your stencil.
We chose the “Love Lives Here” stencil designed by our friend Amy Latta which just fit perfectly with our home-themed project.
You can get this stencil, and others, free on our website with the code ‘ilovestencils.’
Make sure to apply your stencil firmly and evenly.
Use a card scraper to get out all the air bubbles.
Then, fill in the blank spaces with your Scorch Marker.
Remember: A little goes a long way when it comes to this crafting tool.
3. Allow it to Dry
Before removing your stencil and moving on to the next steps, we recommend that you give your design at least 3-5 minutes to dry.
This allows the liquid from the Scorch Marker to soak into the wood fibers and also helps prevent bleeding around the edges.

4. Preheat Your Heat Gun
While your piece is drying, begin preheating your heat gun.
We recommend a heat gun that is at least 1500-watts in order to help you achieve a dark burn that lasts forever.
The SeekOne from Amazon is our favorite, and we use it for all our Scorch Marker crafts.
5. Bring the Design to Life
Now, it’s time for the fun part.
Using your heat gun, begin applying high heat to the design.
Hold your gun approximately 6-8 inches from your craft, and use a sweeping motion to get all the different areas.
After a minute or two, you should begin seeing the change happens as your design rapidly goes from pink to black.
The longer you hold the heat there, the darker the burn will be!
There you have it - your very own home decor, created by you!
The Scorch Marker Make Pyrography Accessible to All
The great thing about the Scorch Marker is that it takes pyrography and makes it better.
It makes the craft more accessible, safer, and even more fun.
This tool also allows you to burn designs onto surfaces that you couldn’t before, and makes wood burning with vinyl stencils possible!
The Scorch Marker really is special. Learn more about its history and our future on YouTube.


Rhonda Carbary
October 17, 2021
Will you be offering larger wood slices for purchase. Sometimes they are harder to find in a 5 inch or larger size. Thank you