

The day you get your new Scorch Marker, it might be tempting to take it to the wood and begin drawing right away.
However, for best results, it is so important to prepare your surface, first.
Not only will this make it easier to apply your design, but this will also help prevent your lines from bleeding, and make your work more permanent.
Preparing Your Wood Surface is Necessary for Successful Crafting
A successful craft must be completed in steps.
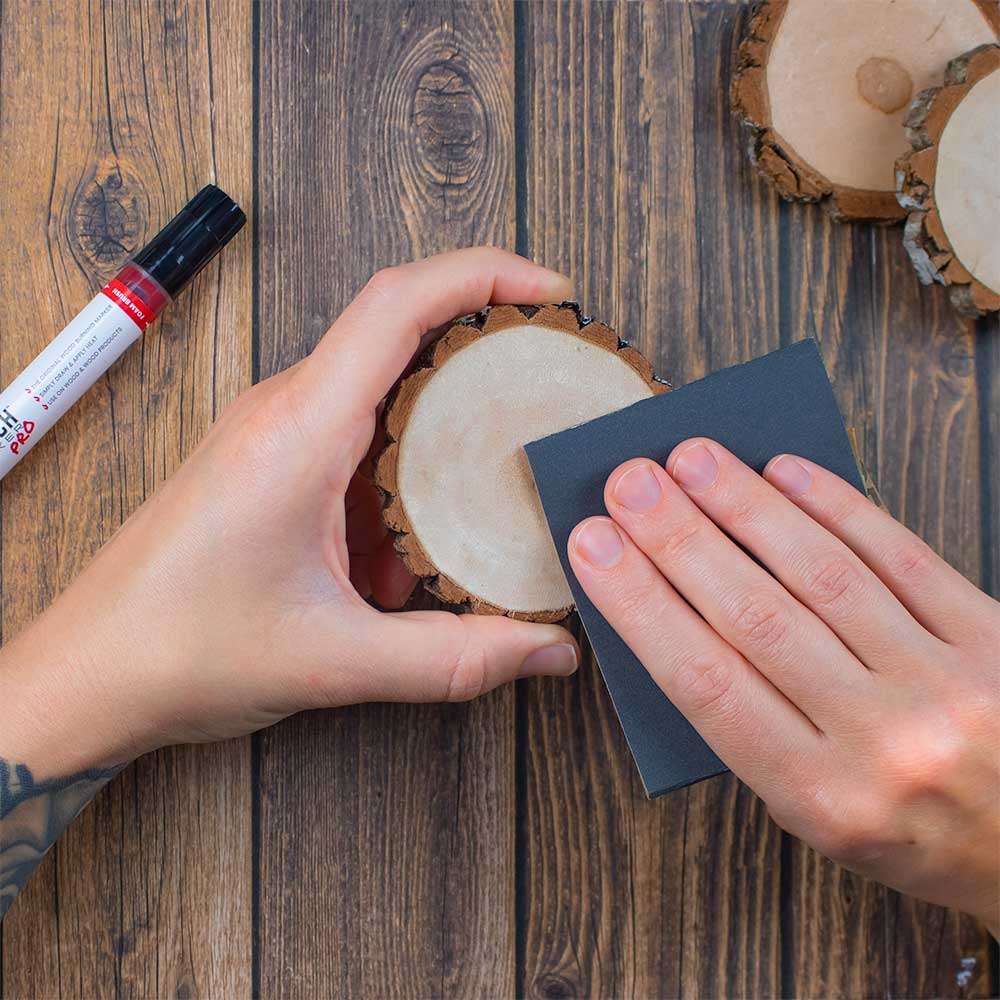
For the Scorch Marker, the most valuable preparation step is in achieving a smooth, even surface.
This is done most efficiently through sanding.
Sanding your wood removes large (and small) imperfections that may interrupt your drawing.
Not only that, but it also provides a better area for the Scorch Marker liquid to soak into.
In this article, we’re giving you tips for sanding your wood surface properly for the most ideal Scorch Marker designs.
This will help all your Scorch Marker projects go faster, easier, and turn out better.

Identify the Direction of the Grain
Before you start drawing, sanding, or doing anything with your wood, take the time to get to know it first.
An awesome way to become familiar with your wood is to pick it up and read the direction of the grain.
This is done by noticing the light and dark strips that naturally run down the board.
The direction in which the wood fibers are running is the direction of the grain.
It is always advised to sand with the grain, instead of against it, in order to work more effectively and prevent micro-scratches or gouges in the wood while sanding.
Choose Your Sandpaper Grit
When you get out to the hardware store and are looking at sandpaper, you’ll quickly realize that they’re not all the same.
Each type is assigned a different number depending on how coarse it is. And, in general, the higher the number the finer the sandpaper grit.
Different sandpaper is required for different jobs.
We’re talking about the most common types you may come into contact with when working with your Scorch Marker.
Coarse Grit
Coarse grit sandpaper is typically in the 40-60 grit range.
It is quite coarse and beneficial for rounding off corners, removing really rough wood edges, and taking off previous layers of paint and finish.
Medium Grit
Medium grit sandpaper ranges from the 60-100 grit range.
This is your general-purpose sandpaper and is great for removing lines from the mill.
Fine Grit
Typically ranging in the 100-220 grit range, fine-grit sandpaper helps achieve a glossy smooth surface.
Fine grit sandpaper gives the best surface for working on and is what we recommend sanding to before applying the Scorch Marker.
The sandpaper that you choose first will depend on the condition of your wood.
Raw wood with super jagged edges will require coarser-grit sandpaper in the beginning.
All surfaces should be sanded to 220-grit before the Scorch Marker is applied.
Wipe Your Surface Until Clean
Once you’re finished with sanding, wipe your wood surface clean.
Sanding produces lots of dust, which could make it quite difficult for your Scorch Marker tip to penetrate.
Wipe this away for a truly smooth surface that is ready for the best designs!
To read more about successfully using the Scorch Marker, and producing results that you’re proud of every time, check out the beginner’s guide on our blog.


Sue
March 10, 2021
I see you can use the cricut heat press. What temperature and for how long would you press it for.